Machine Learning Lifecycle Management with ML.NET, Automated ML and MLFlow
Introduction
As machine learning matures, best practices are starting to be adopted. Application lifecycle management has been a common practice within software development for some time. Now, some of those practices are starting to become adopted in the machine learning space. One of the challenges application lifecycle management addresses in machine learning is reproducibility.
Machine learning is extremely experimental in nature. Therefore, in order to find the "best" model, various algorithms and hyper-parameters need to be tested. This can sometimes be a manual process. At Build 2019, Automated ML was announced for ML.NET. In addition to automating the training process, this framework will try to find the best model by iterating over various algorithms and hyper-parameters until it finds the "best" model based on the selected optimization metric. The output will consist of results for the best run along with results for all other runs. These runs contain performance metrics, learned model parameters, the training pipeline used and the trained model for the respective run. This information can then be used for auditing purposes as well as to reproduce results.
The results from running Automated ML can be persisted locally or in a database. However in 2018 a product called MLFlow was launched. MLFlow is an open source machine learning lifecycle management platform. Since its announcement, MLFlow has seen adoption throughout the industry and most recently Microsoft announced native support for it inside of Azure ML. Although MLFlow does not natively support .NET, it has a REST API that allows extensibility to non-natively supported languages. This means that if throughout your enterprise or projects, MLFlow has been adopted in Python or R applications, using the REST API you can integrate MLFlow into your ML.NET applications.
In this writeup, I will go over how to automatically build an ML.NET classification model that predicts iris flower types using Automated ML and then integrate MLFlow to log the results generated by the best run. The code for this sample can be found on GitHub.
Prerequisites
This project was built on an Ubuntu 18.04 PC but should work on Windows and Mac. Note that MLFlow does not natively run on Windows at the time of this writing. To run it on Windows use Windows Subsystem for Linux (WSL).
Setup
Create Solution
First we'll start off by creating a solution for our project. In the terminal enter the following commands:
mkdir MLNETMLFlowSample && cd MLNETMLFlowSample
dotnet new sln
Create Console Application
Once the solution is created, from the root solution directory, enter the following commands into the terminal to create a console application.
dotnet new console -o MLNETMLFlowSampleConsole
Then, navigate into the newly created console application folder.
cd MLNETMLFlowSampleConsole
Install NuGet Packages
For this solution, you'll need the following NuGet packages:
From the console application directory, enter the following commands into the terminal to install the packages.
dotnet add package Microsof.ML
dotnet add package Microsoft.ML.AutoML
dotnet add package MLFlow.NET --version 1.0.0-CI-20181206-054144
Get The Data
The data used in this dataset comes from the UCI Machine Learning Repository and looks like the data below:
5.1,3.5,1.4,0.2,Iris-setosa
4.9,3.0,1.4,0.2,Iris-setosa
4.7,3.2,1.3,0.2,Iris-setosa
4.6,3.1,1.5,0.2,Iris-setosa
First, create a directory for the data inside the console application directory:
mkdir Data
Then, download and save the file into the Data directory.
curl -o Data/iris.data https://archive.ics.uci.edu/ml/machine-learning-databases/iris/iris.data
Finally, make sure that the data file is copied into your output directory by adding the following section to your console application csproj file inside the Project tags:
<ItemGroup>
    <Content Include="Data/iris.data">
        <CopyToOutputDirectory>PreserveNewest</CopyToOutputDirectory>
    </Content>
</ItemGroup>
Configure MLFlow Service
MLFlow.NET Settings
MLFlow.NET requires two settings, the base URL where the MLFlow server listens on and the API endpoint. In this case since it will be running locally, the base URL is http://localhost:5000. In the console application directory, create a file called appsettings.json and add the following content:
{
    "MLFlowConfiguration": {
        "MLFlowServerBaseUrl": "http://localhost:5000",
        "APIBase": "api/2.0/preview/mlflow/"
    }
}
To make sure that your appsettings.json is copied into your output directory, add the following content to your csproj file under the content tags that include the iris.data file.
<Content Include="appsettings.json">
    <CopyToOutputDirectory>PreserveNewest</CopyToOutputDirectory>
</Content>
Register MLFLow.NET Service
In this sample, the MLFlow.NET service is registered and used via dependency injection. However, in order to use dependency injection in our console application it first needs to be configured. In the console application directory, create a new file called Startup.cs and add the following code to it:
using System;
using Microsoft.Extensions.Configuration;
using Microsoft.Extensions.DependencyInjection;
using MLFlow.NET.Lib;
using MLFlow.NET.Lib.Contract;
using MLFlow.NET.Lib.Model;

namespace MLNETMLFlowSampleConsole
{
    public class Startup
    {
        private readonly IConfiguration Configuration;
        public IServiceProvider Services;

        public Startup()
        {
            Configuration =
                new ConfigurationBuilder()
                    .AddJsonFile("appsettings.json", false)
                    .Build();
        }

        public void ConfigureServices()
        {
            var services = new ServiceCollection();

            // Add and configure MLFlow Service
            services.AddMFlowNet();
            services.Configure<MLFlowConfiguration>(
                Configuration.GetSection(nameof(MLFlowConfiguration))
            );

            Services = services.BuildServiceProvider();
        }
    }
}
The Startup class loads configuration settings from the appsettings.json file in the constructor. Then, the ConfigureServices method registers the MLFlow.NET service and configures it using the settings defined in the appsettings.json file. Once that this is set up, the service can be used throughout the application.
Create Data Schema
When working with ML.NET, it often helps to create data models or classes that define the data's schema.
For this sample, there are four columns with float values which will be the input data or features. The last column is the type of iris flower which will be used as the label or the value to predict.
First, create a new directory called Domain inside the console application directory to store the data model classes.
mkdir Domain
Inside the Domain directory, create a new file called IrisData.cs and add the following contents to the file:
using Microsoft.ML.Data;

namespace MLNETMLFlowSample.Domain
{
    public class IrisData
    {
        [LoadColumn(0, 3),
        VectorType(4),
        ColumnName("Features")]
        public float Features { get; set; }

        [LoadColumn(4),
        ColumnName("Label")]
        public string IrisType { get; set; }
    }
}
Using attributes in the schema, we define two properties: Features and IrisType. Data from columns in positions 0-3 will be loaded as a float vector of size four into the Features property. ML.NET will then reference that column by the name Features. Data in the last column will be loaded into the IrisType property and be referenced by the name Label. The reason for setting column names is ML.NET algorithms have a default column names and renaming properties at the schema level removes the need to define the feature and label columns in the pipeline.
Create Progress Handler
By default, running the application won't display progress information. However, a ProgressHandler object can be passed into the Execute method of an experiment which calls the implemented Report method.
Inside the console application directory, create a new file called ProgressHandler.cs and add the following code:
using System;
using Microsoft.ML.AutoML;
using Microsoft.ML.Data;
using Microsoft.ML.Trainers;

namespace MLNETMLFlowSampleConsole
{
    public class ProgressHandler : IProgress<RunDetail<MulticlassClassificationMetrics>>
    {
        public void Report(RunDetail<MulticlassClassificationMetrics> runDetails)
        {
            Console.WriteLine($"Ran {runDetails.TrainerName} in {runDetails.RuntimeInSeconds:0.##} with Log Loss {runDetails.ValidationMetrics.LogLoss:0.####}");
        }
    }
}
The ProgressHandler class derives from the IProgress<T> interface which requires the implementation of the Report method. The object being passed into the Report method after each run is an RunDetail<MulticlassCLassificationMetrics> object. Each time a run is complete, the Report method is called and the code inside it executes.
Create Experiment
Open the Program.cs file and add the following using statements.
using System;
using System.IO;
using System.Threading.Tasks;
using Microsoft.ML;
using Microsoft.ML.Data;
using Microsoft.ML.AutoML;
using Microsoft.Extensions.DependencyInjection;
using MLNETMLFlowSampleConsole.Domain;
using MLFlow.NET.Lib;
using MLFlow.NET.Lib.Contract;
using MLFlow.NET.Lib.Model;
using MLFlow.NET.Lib.Model.Responses.Experiment;
using MLFlow.NET.Lib.Model.Responses.Run;
Initialize Services
Then, inside of the Program class, define the IMLFlowService:
private readonly static IMLFlowService _mlFlowService;
Directly after that, create a constructor which is where _mlFLowService will be instantiated.
static Program()
{
    // Initialize app configuration
    var appConfig = new Startup();
    appConfig.ConfigureServices();

    // Initialize MLFlow service
    _mlFlowService = appConfig.Services.GetService<IMLFlowService>();
}
Define Experiment Steps
Then, add a method called RunExperiment inside the Program class that contains the following code:
public static async Task RunExperiment()
{
    // 1. Create MLContext
    MLContext ctx = new MLContext();

    // 2. Load data
    IDataView data = ctx.Data.LoadFromTextFile<IrisData>("Data/iris.data", separatorChar: ',');

    // 3. Define Automated ML.NET experiment settings
    var experimentSettings = new MulticlassExperimentSettings();
    experimentSettings.MaxExperimentTimeInSeconds = 30;
    experimentSettings.OptimizingMetric = MulticlassClassificationMetric.LogLoss;

    // 4. Create Automated ML.NET
    var experiment = ctx.Auto().CreateMulticlassClassificationExperiment(experimentSettings);

    // 5. Create experiment in MLFlow
    var experimentName = Guid.NewGuid().ToString();
    var experimentRequest = await _mlFlowService.GetOrCreateExperiment(experimentName);

    // 6. Run Automated ML.NET experiment
    var experimentResults = experiment.Execute(data, progressHandler: new ProgressHandler());

    // 7. Log Best Run
    LogRun(experimentRequest.ExperimentId,experimentResults);

    string savePath = Path.Join("MLModels", $"{experimentName}");
    string modelPath = Path.Join(savePath, "model.zip");

    if (!Directory.Exists(savePath))
    {
        Directory.CreateDirectory(savePath);
    }

    // 8. Save Best Trained Model
    ctx.Model.Save(experimentResults.BestRun.Model, data.Schema, modelPath);
}
The RunExperiment method does the following:
- Creates an
MLContextobject. - Loads data from the
iris.datafile into anIDataView. - Configures experiment to run for 30 seconds and optimize the Log Loss metric.
- Creates a new Automated ML.NET experiment.
- Creates a new experiment in MLFlow to log information to.
- Runs the Automated ML.NET experiment and provide an instance of
ProgressHandlerto output progress to the console. - Uses the
LogRunmethod to log the results of the best run to MLFlow. - Creates a directory inside the
MLModelsdirectory using the name of the experiment and saves the trained model inside it under themodel.zipfile name.
Log Progress
After the RunExperiment method, create the LogRun method and add the following code to it:
static async void LogRun(int experimentId, ExperimentResult<MulticlassClassificationMetrics> experimentResults)
{
    // Define run
    var runObject = new CreateRunRequest();
    runObject.ExperimentId = experimentId;
    runObject.StartTime = ((DateTimeOffset)DateTime.UtcNow).ToUnixTimeMilliseconds();
    runObject.UserId = Environment.UserName;
    runObject.SourceType = SourceType.LOCAL;

    // Create new run in MLFlow
    var runRequest = await _mlFlowService.CreateRun(runObject);

    // Get information for best run
    var runDetails = experimentResults.BestRun;

    // Log trainer name
    await _mlFlowService.LogParameter(runRequest.Run.Info.RunUuid, nameof(runDetails.TrainerName), runDetails.TrainerName);

    // Log metrics
    await _mlFlowService.LogMetric(runRequest.Run.Info.RunUuid, nameof(runDetails.RuntimeInSeconds), (float)runDetails.RuntimeInSeconds);
    await _mlFlowService.LogMetric(runRequest.Run.Info.RunUuid, nameof(runDetails.ValidationMetrics.LogLoss), (float)runDetails.ValidationMetrics.LogLoss);
    await _mlFlowService.LogMetric(runRequest.Run.Info.RunUuid, nameof(runDetails.ValidationMetrics.MacroAccuracy), (float)runDetails.ValidationMetrics.MacroAccuracy);
    await _mlFlowService.LogMetric(runRequest.Run.Info.RunUuid, nameof(runDetails.ValidationMetrics.MicroAccuracy), (float)runDetails.ValidationMetrics.MicroAccuracy);
}
The LogRun method takes in the experiment ID and results. Then, it does the following:
- Configures local
RunRequestobject to log in MLFlow. - Creates run in MLFLow using predefined configuration.
- Logs the name of the machine learning algorithm used to train the best model in MLFlow.
- Logs the amount of seconds it took to train the model in MLFLow.
- Logs various performance metrics in MLFlow
Implement Main Method
Finally, in the Main method of the Program class, call the RunExperiment method.
static async Task Main(string[] args)
{
    // Run experiment
    await RunExperiment();
}
Since the Main method in the Program class will be async, you need to use the latest version of C#. To do so, add the following configuration inside the PropertyGroup section of your csproj file.
<LangVersion>latest</LangVersion>
Run The Application
Start MLFlow Server
In the terminal, from the console application directory, enter the following command to start the MLFlow Server:
mlflow server
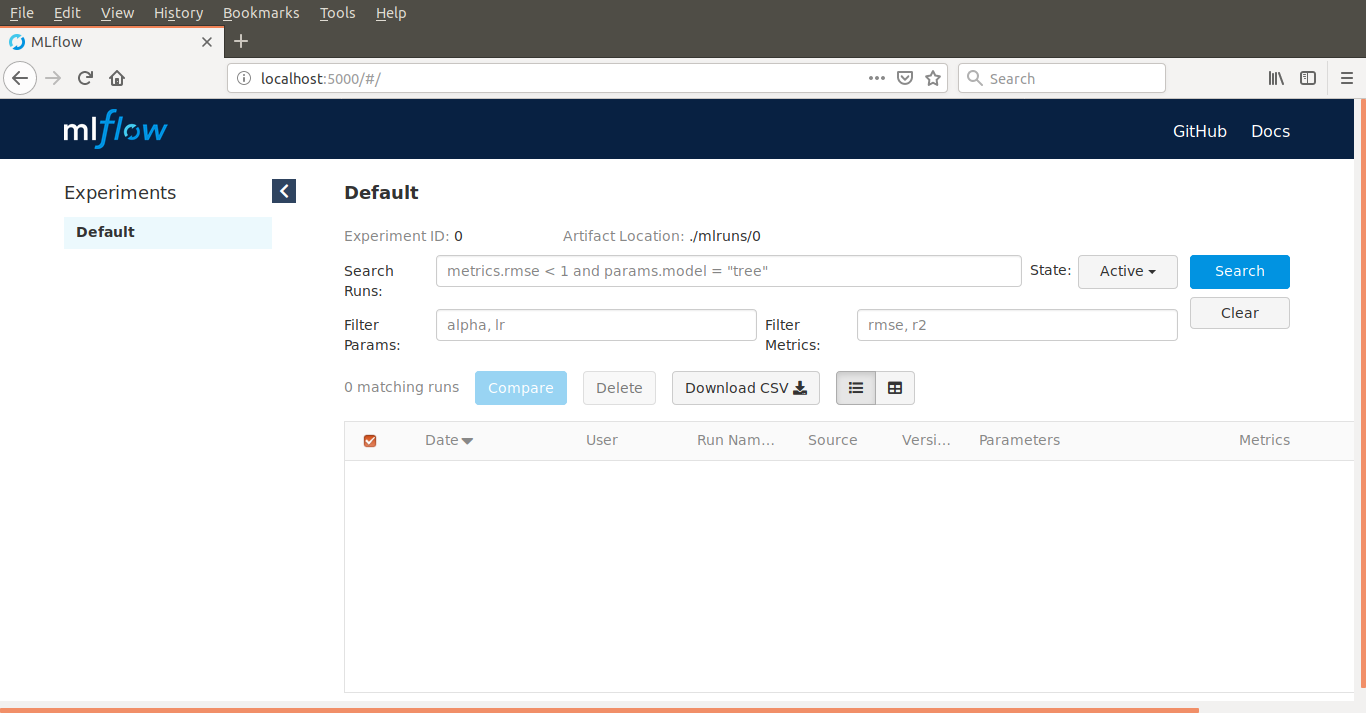
Navigate to http://localhost:5000 in your browser. This will load the MLFLow UI.
Train Model
Then, in another terminal, from the console application directory, enter the following command to run the experiment:
dotnet build
dotnet run
As the experiment is running, the progress handler should be posting output to the console after each run.
Ran AveragedPerceptronOva in 1.24 with Log Loss 0.253
Ran SdcaMaximumEntropyMulti in 3.21 with Log Loss 0.0608
Ran LightGbmMulti in 0.64 with Log Loss 0.2224
Ran FastTreeOva in 1.54 with Log Loss 0.3978
Ran LinearSvmOva in 0.25 with Log Loss 0.2874
Ran LbfgsLogisticRegressionOva in 0.36 with Log Loss 0.566
Ran SgdCalibratedOva in 0.78 with Log Loss 0.7224
Ran FastForestOva in 1.28 with Log Loss 0.125
Ran LbfgsMaximumEntropyMulti in 0.25 with Log Loss 0.4537
Ran SdcaMaximumEntropyMulti in 0.19 with Log Loss 0.4576
Ran LightGbmMulti in 0.25 with Log Loss 0.2592
Ran FastForestOva in 1.98 with Log Loss 0.0961
Ran SdcaMaximumEntropyMulti in 0.39 with Log Loss 0.108
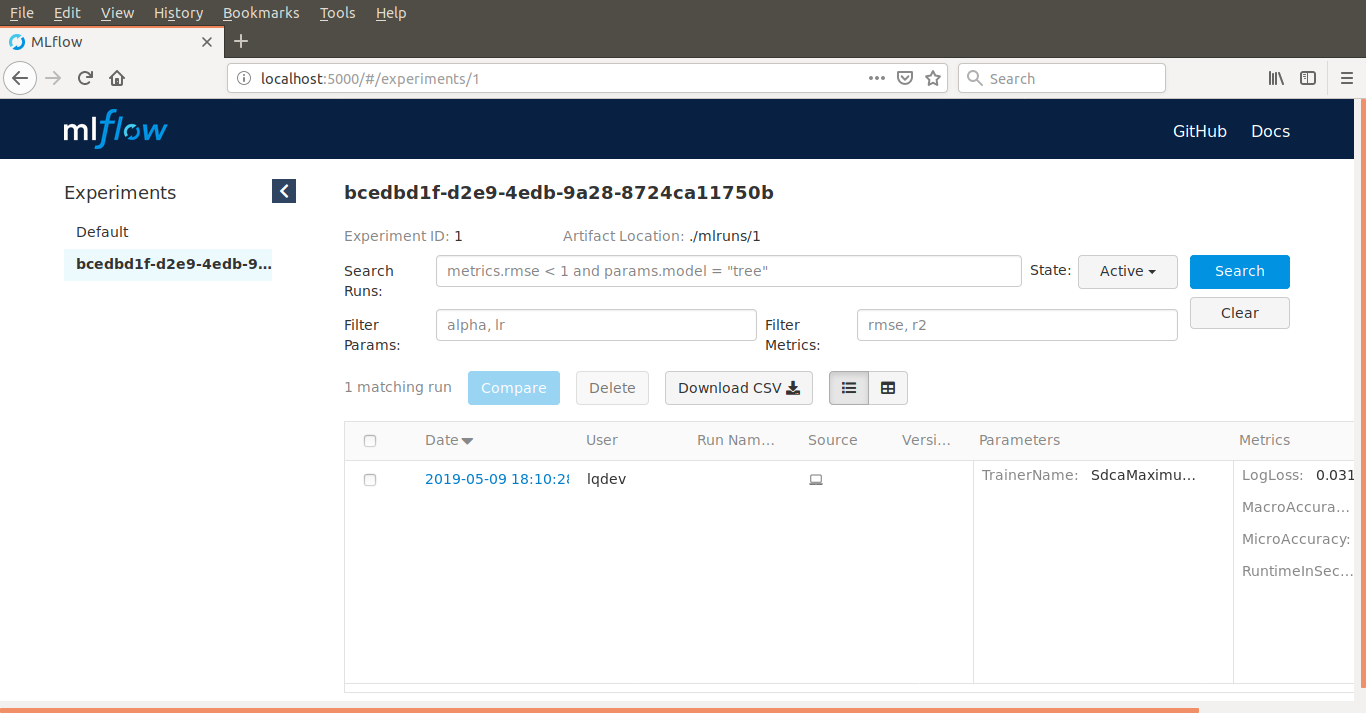
Navigate to http://localhost:5000 in your browser. You should then see the results of your experiment and runs there.
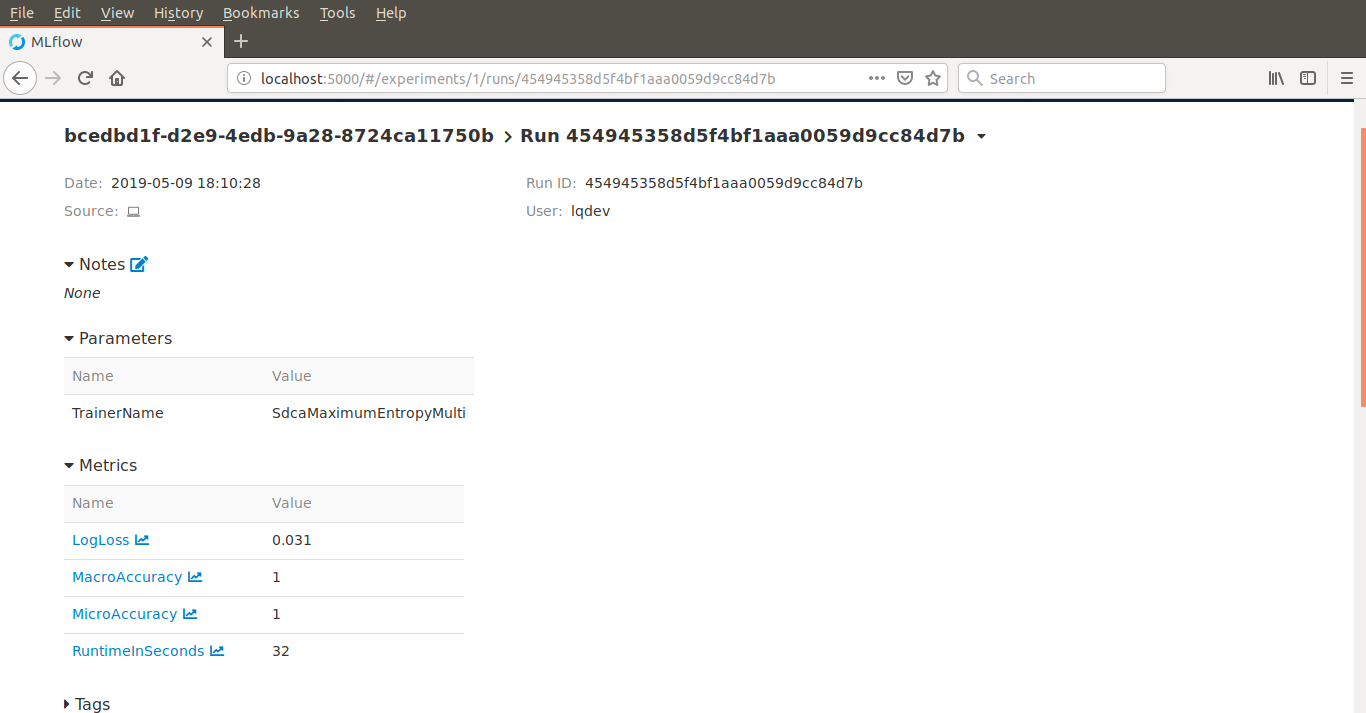
Inspecting the detailed view of the best run for that experiment would look like the image below:
You'll also notice that two directories were created inside the console application directory. On is an MLModels directory, inside of which a nested directory with the name of the experiment contains the trained model. Another called mlruns. In the mlruns directory are the results of the experiments logged in MLFlow.
Conclusion
In this writeup, we built an ML.NET classification model using Automated ML. Then, the results of the best run generated by Automated ML were logged to an MLFlow server for later analysis. Note that although some of these tools are still in their nascent stage, as open source software, the opportunities for extensibility and best practice implementations are there. Happy coding!